...
Request a consultation

Before & After: Fixing Common Window Replacement Mistakes in Colorado Homes

The most common window replacement mistakes in Colorado homes are choosing the wrong replacement method (insert vs. full-frame), skipping proper flashing, and failing to air seal around the window—because those three mistakes lead to drafts, water intrusion, and disappointing performance.

The fix is usually not “a better window” but a better system: the right replacement approach plus modern flashing and sealing.

Key Takeaways

Key takeaways are that full-frame replacement enables the best water and air management, insert replacement is situational, and sealing details are where most projects win or lose.

  • Flashing must direct water out, not into the wall cavity.
  • Rough-opening air sealing prevents major leakage pathways.
  • Insert replacement reduces glass area and can hide problems if the frame is compromised.
  • Full-frame replacement is intrusive, but it’s the highest performance option.
  • Even high-efficiency windows need correct installation to perform as intended.

What are the most common window replacement mistakes?

The most common window replacement mistakes are:

  1. Picking insert replacement when the frame is damaged
  2. Missing or improperly lapped flashing
  3. Not sealing the rough opening air gap
  4. Using the wrong foam or overfilling gaps (causing frame deflection)
  5. Ignoring water intrusion signs (stains, soft sills, peeling finishes)

Building America guidance stresses that windows are a common location of water infiltration problems, and installation should follow modern flashing, water sealing, and air sealing practices aligned with ASTM E2112.

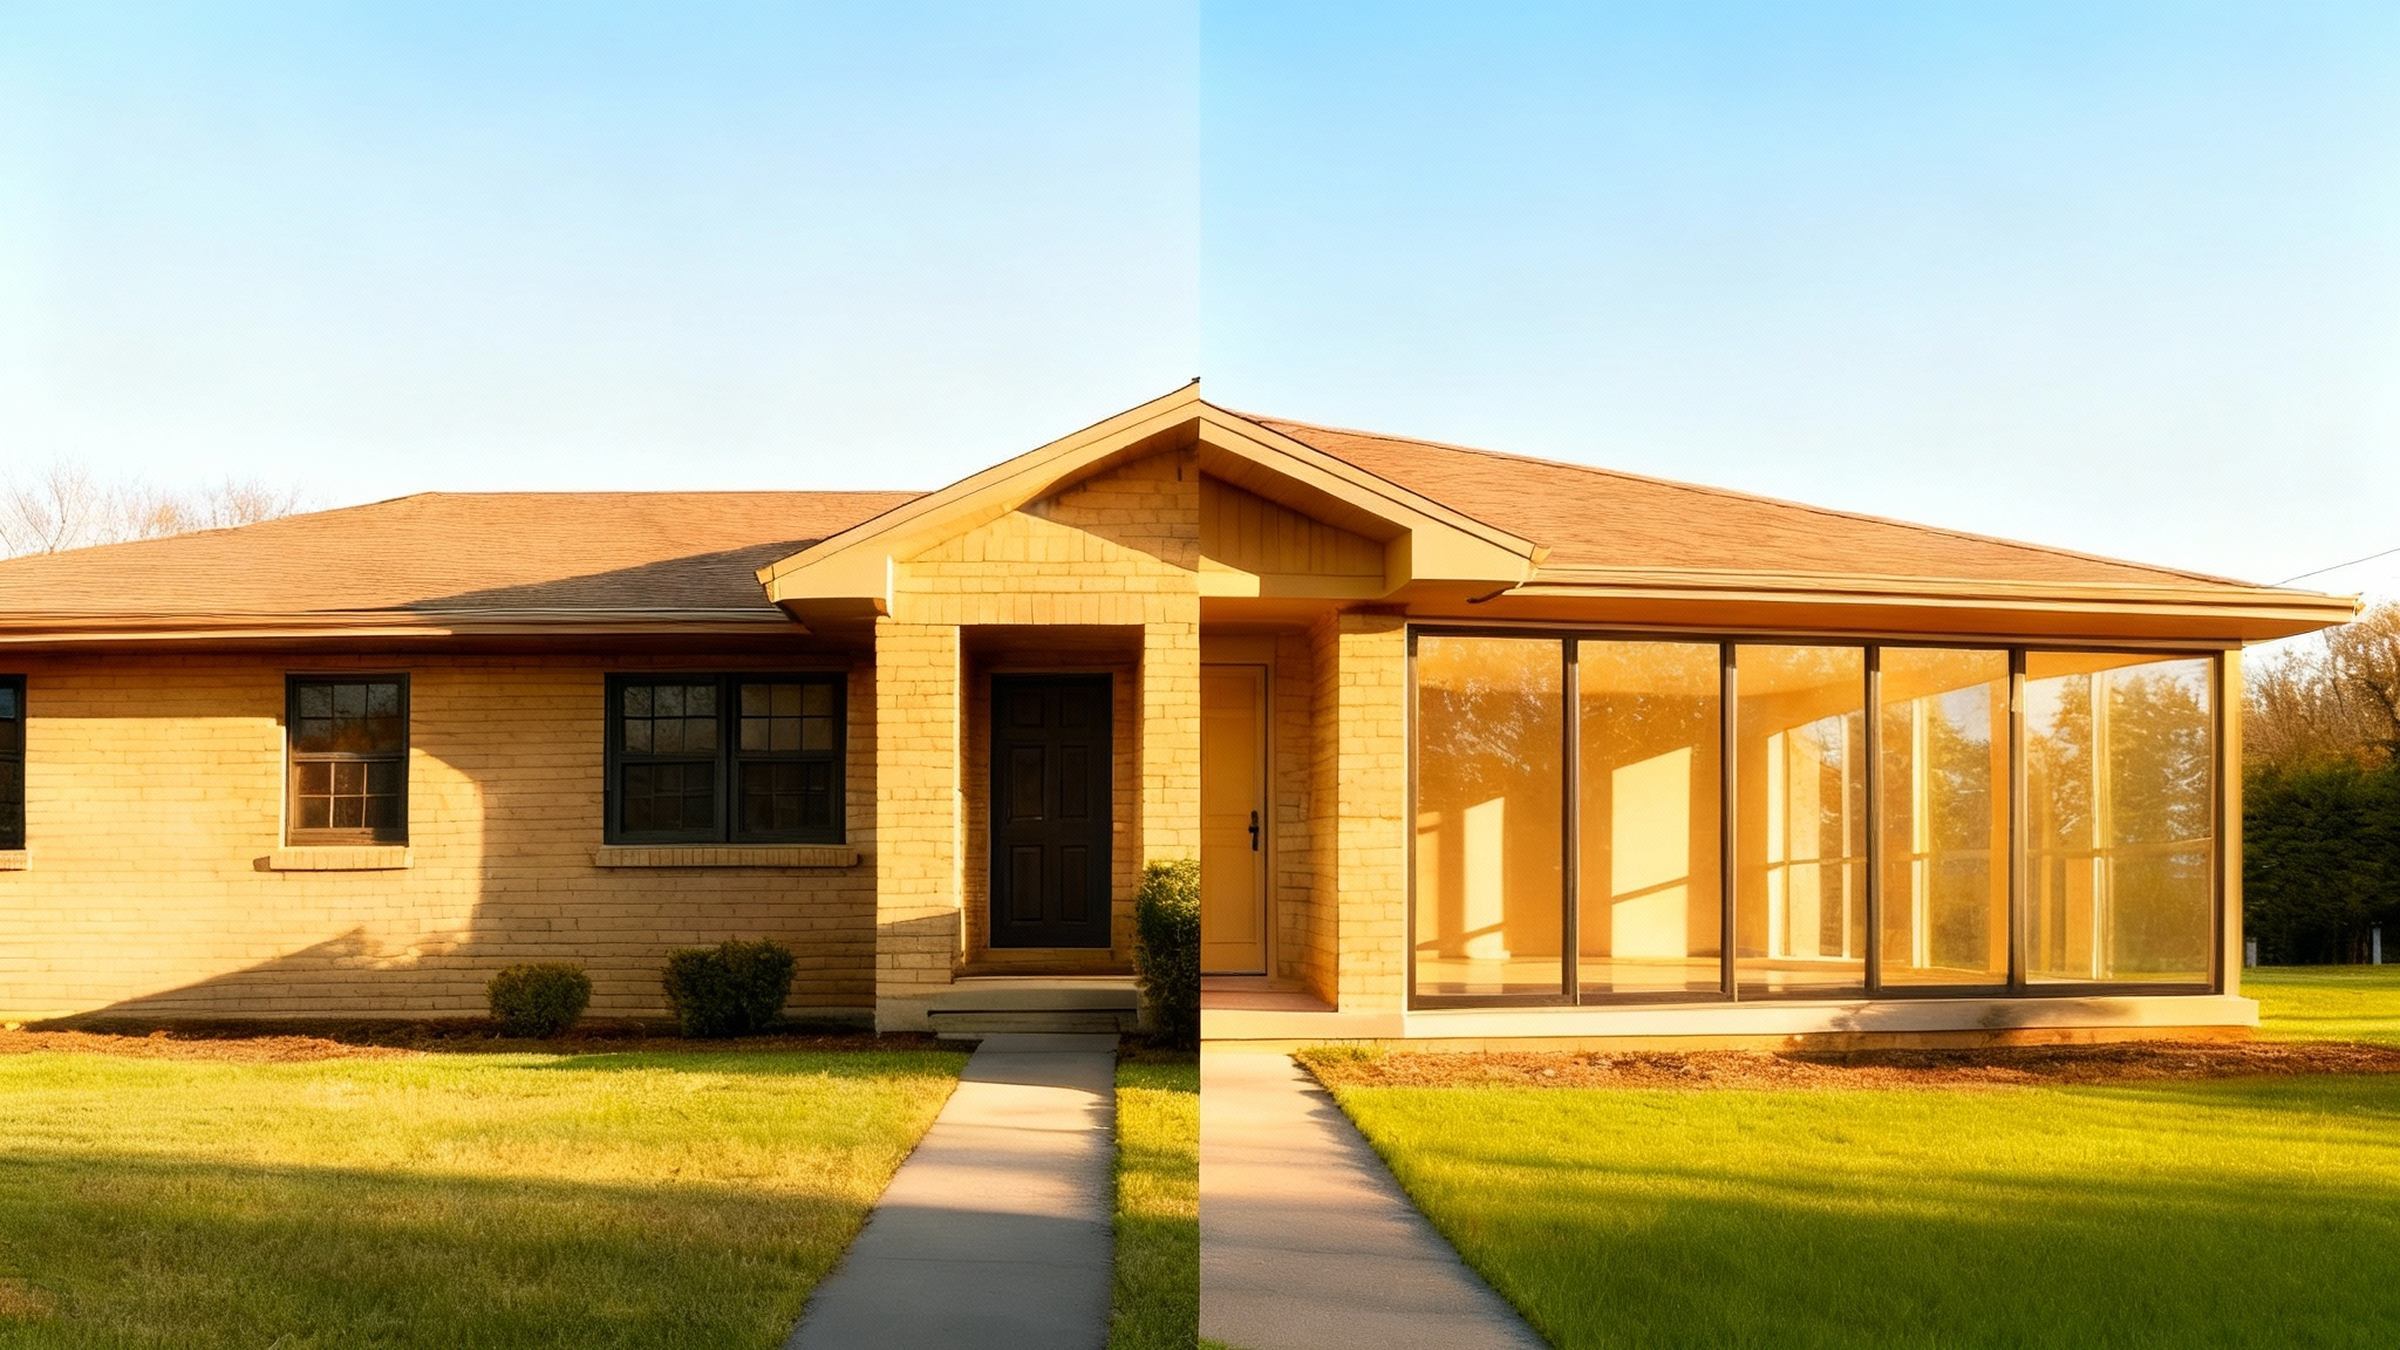
Before & After #1: “The insert-over-rot problem”

Before: A homeowner chooses an insert (“pocket”) replacement because it’s faster and less disruptive. The new unit fits inside the existing frame, but the existing sill and frame have hidden deterioration. Over time, the same leakage pathway continues, and comfort doesn’t improve as expected.

After: The homeowner switches to complete window and frame replacement. This approach removes the full frame back to the rough opening, allowing repairs, new flashing integration, and modern air sealing. Building America calls this the “highest performance” (but most intrusive) option and notes it enables installation using modern standards and techniques.

What changed: the project stopped “covering” the problem and started correcting the enclosure details that caused it.

Before & After #2: “The missing sill pan / wrong flashing lap”

Before: The window is installed, but flashing is incomplete or sequenced wrong. Water that gets behind siding can get directed into the wall instead of out. The interior looks fine—until it doesn’t.

After: The opening is reflashed with properly lapped sill (pan) flashing, side flashing, and head flashing, integrated with the drainage plane so water is directed out. Building America’s flashing guide emphasizes that windows and doors interrupt the wall drainage plane and must be fully flashed to prevent hidden damage.

What changed: water management became a system, not a bead of caulk.

Before & After #3: “The drafty finish (insulation without air sealing)”

Before: A window is installed and trimmed, but the gap between the window frame and rough opening is stuffed with fibrous insulation only. The homeowner still feels drafts and hears more outside noise than expected.

After: The gap is sealed correctly with backer rod, low-expansion foam, and/or caulk—without bending the frame. Building Science Education notes that rough openings can be major leakage points, and cites ORNL testing showing that sealing the gap can cut leakage dramatically compared to leaving it unsealed.

What changed: the gap became an air barrier, not just “filled space.”

How do you decide between full-frame vs. insert replacement?

You decide between full-frame vs. insert replacement by looking at the condition of the existing frame and your goals.

Insert replacement is a method of installing a new framed window within the original frame, and it has tradeoffs like reduced vision area and appearance impacts.

Complete (full-frame) replacement removes the entire window frame back to the rough framing, which allows new flashing, sealing, and repairs—but it’s typically more disruptive and costly.

A simple rule that holds up:

  • Choose insert only when the existing frame/sill is sound and square.
  • Choose full-frame when you see (or suspect) water damage, rot, or chronic leakage paths.

What should your installer be able to explain clearly?

Your installer should be able to explain the installation steps, not just the window brand.

Ask:

  • “How will you flash the sill, jambs, and head, and how does it tie into the drainage plane?”
  • “How will you air seal the rough opening—what material, where, and how do you avoid frame deflection?”
  • “If you find rot or damage after removal, what’s the repair plan?”
  • “Are you installing according to the manufacturer’s instructions?” (DOE notes improper installation can void warranties and reduce performance.)

Example / Template

Example / template scopes make quotes comparable and prevent “missing steps.”

Scope line item What “good” looks like Why it matters
Replacement method Insert only if the frame is sound; full-frame if damaged Wrong method = hidden problems remain
Flashing Sill pan + side + head, properly lapped Directs water out, prevents wall damage
Air sealing Backer rod/low-expansion foam/caulk as appropriate Reduces drafts and leakage pathways
Final checks The window operates smoothly; locks align Misalignment reduces sealing and security

FAQs

What is an “insert” (pocket) replacement window?

An insert (pocket) replacement window is installed within the original window frame after removing the operable sash and stops, which typically retains exterior trim like brick molding. It can improve performance, but it reduces the vision area and is not the best choice when the existing frame is compromised.

When is full-frame replacement the smarter choice?

Full-frame replacement is the smarter choice when there is rot, water intrusion, out-of-square openings, or when you want modern flashing and sealing integrated from the rough opening outward. Building America notes it is the highest performance option but more intrusive.

Should window replacement include flashing even if siding isn’t being replaced?

Yes—window replacement should still include proper water management details because windows are a common location of water infiltration. Properly integrated flashing helps direct water out and reduces the risk of hidden wall damage.

Why do new windows still feel drafty sometimes?

New windows can still feel drafty when the rough opening gap is not air sealed correctly or when foam/backer rod is installed in a way that deflects the frame. ENERGY STAR and Building Science guidance both emphasize sealing behind trim and using appropriate materials for gaps.

Checklist

A checklist prevents “pretty windows, bad performance.”

  • Confirm the right replacement method (insert vs. full-frame).
  • Require a flashing plan that ties into the drainage plane.
  • Require interior rough-opening air sealing details.
  • Confirm the installer follows manufacturer instructions.
  • Confirm smooth operation and lock alignment at walkthrough.

Summary

Most “bad window replacements” are really enclosure failures: wrong method, weak flashing, and missed air sealing. When those three issues are fixed, comfort and performance usually improve immediately and stay stable over time.

If you want your replacement to last in Colorado, treat the project like a system: the window, the water management, and the air sealing all have to work together. That’s how you avoid the painful cycle of “new windows, same problems.”

Want a window replacement scope that’s built for Colorado, not just a generic install? Contact us for a complimentary consultation and ask us to walk you through full-frame vs. insert options, flashing details, and air sealing so your upgrade actually performs. We serve Colorado Springs and the entire Front Range.

Custom Features that Matter in Colorado: Hail-Resistant Glass, Noise Control & Security Upgrades

Colorado homeowners should prioritize laminated safety glass, tighter air sealing, and upgraded locking hardware because those three upgrades directly address hail breakage, outside noise, and forced entry. Colorado’s weather and elevation make “standard” window packages feel fine on paper but underperform in real life, especially on the Front Range.

Key Takeaways

Key takeaways are that laminated glass improves post-impact safety, sound ratings (like STC) help compare noise control, and proper flashing/air sealing often matters as much as the glass package.

  • “Hail-resistant” usually means stronger glazing choices, not “hail-proof.”
  • Laminated glass is a safety glazing type recognized in federal glazing safety standards.
  • STC is a standardized sound rating based on ASTM methods, so it’s useful for comparisons.
  • Air leaks around the frame can undermine noise control and comfort.
  • Flashing and water management details prevent hidden wall damage around windows.

Why do Colorado homes need different window upgrades?

Colorado homes need different window upgrades because hail risk and weather swings are unusually high across the Front Range, and that changes what fails first. The Rocky Mountain Insurance Information Association notes the Front Range is in “Hail Alley,” with recurring catastrophic hailstorms and billions in insured losses over time.

That doesn’t mean every home needs the most expensive glass available. It means your upgrade money should go to the failure points Colorado is famous for: impact events, drafts, and comfort issues.

What does “hail-resistant glass” actually mean?

“Hail-resistant glass” usually means you’re selecting glazing that’s more resilient to impact and safer if it breaks, not that it can’t break. In real-world terms, you’re trying to reduce (1) the chance of breakage and (2) the mess, safety risk, and water intrusion if breakage happens.

A practical upgrade path many homeowners use is:

  1. A stronger outer pane choice (often tempered in many applications)
  2. A laminated inner pane so the glass tends to stay together if cracked
  3. A frame + installation that keeps water out if the outer pane is damaged

If you’re comparing “impact-rated” windows, understand that impact certification is often tied to windborne-debris standards built for hurricanes. ASTM notes those standards were developed for hurricanes but may be used for other similar windstorms involving debris.

What are laminated safety glass options, and why do they matter?

panes so the glass tends to remain bonded after it cracks. This is why laminated glass is commonly discussed as “stays together” glass and why it’s used in applications where post-breakage behavior matters.

Two practical benefits for Colorado homeowners:

  • Post-impact safety: fewer loose shards and a “held together” break pattern.
  • Security delay: it can take longer to penetrate than standard annealed glass because the interlayer resists quick punch-through.

What to ask for when you’re shopping:

  • “Is laminated glass included on the interior pane?”
  • “Is it laminated on all operable units or only fixed windows?”
  • “Does the quote specify laminated thickness/interlayer type?”

How do you reduce outside noise with windows?

You reduce outside noise with windows by improving both glass performance and airtightness, because sound sneaks through gaps just like cold air. This is why “better glass” can underperform if the installation leaves leakage around the frame.

The simplest way to compare window sound control is the Sound Transmission Class (STC) rating. STC is a single-number rating used to compare sound insulation performance, and it’s calculated based on ASTM methods (including ASTM E90 measurements and ASTM E413 rating procedure).

Noise-control upgrades that usually help the most:

  • Laminated (acoustic) glass (often improves sound damping versus standard glass).
  • Thicker or mixed-thickness panes (breaks up vibration patterns).
  • Better perimeter sealing and air sealing at the rough opening (stops the “gap leak” pathway).

Which window security hardware upgrades are worth it?

Window security upgrades that are usually worth it are the ones that harden the easiest entry points: weak latches, easy-to-pry sashes, and ground-level openings.

A good “security stack” looks like this:

  • Upgraded window locks (ask about stronger sash locks or multi-point style hardware where available)
  • Properly aligned frames (a window that’s out of square often doesn’t lock as tightly)
  • Laminated glass on vulnerable openings (adds resistance and delays entry compared to a quick smash)

Research summaries aimed at policing and prevention note that burglars often exploit unsecured windows and doors, and a large share of burglaries involve forced entry using simple tools.

How do you pick the right upgrade package for your home?

You pick the right upgrade package by matching features to the problem you’re actually trying to solve.

  • If hail is your top concern: prioritize laminated safety glass options and ask about impact performance.
  • If noise is your top concern: prioritize a higher STC-rated configuration and airtight installation details.
  • If security is your top concern: prioritize locking hardware upgrades plus laminated glass on first-floor windows.

Example / Template

Example / template tables are useful because they make “feature shopping” concrete and comparable.

Problem you’re solving Best upgrade to ask about Why it helps
Hail damage risk Laminated safety glass on interior pane Holds together after cracking; safer break behavior
Road / neighbor noise Higher STC configuration + airtight install STC helps compare sound control; air leaks kill performance
Forced entry concern Stronger locks + laminated glass on first floor Harder to defeat quickly than basic latch + standard glass
Drafts + comfort swings Proper air sealing around the frame Reduces leakage pathways that cause drafts
Hidden water intrusion risk Proper flashing tied into drainage plane Directs water out instead of into the wall

FAQs

Is laminated glass the same as tempered glass?

Laminated glass is not the same as tempered glass because laminated glass uses an interlayer to keep cracked glass bonded, while tempered glass is heat-treated to break into smaller pieces. Laminated glass is often chosen for post-breakage behavior and can also help with sound damping.

What is a “good” STC rating for windows?

A “good” STC rating depends on how noisy your area is, but the key is using STC to compare options consistently. STC is a standardized rating tied to ASTM test and rating methods, so it’s useful for apples-to-apples comparisons across products.

Are impact-rated windows worth it in Colorado?

Impact-rated windows can be worth it if you want a higher level of impact testing and you’re comparing products with clear documentation. Many impact ratings reference hurricane windborne-debris standards, and ASTM notes those standards may be used for other similar windstorms involving debris.

Does installation really matter for noise and comfort?

Installation matters for noise and comfort because air leaks around the window/frame act like a direct pathway for drafts and sound. Window and door openings are vulnerable points, and proper flashing and air sealing are part of preventing performance problems over time.

Checklist

A checklist is the fastest way to make sure your quote includes what you think it includes.

  • Identify your top risk: hail, noise, or security.
  • Ask for laminated glass options on vulnerable windows.
  • Compare STC ratings when noise is a priority.
  • Confirm flashing details and water management approach.
  • Confirm interior air sealing method around the frame.
  • Make locks and hardware part of the scope, not an afterthought.

Summary

Colorado-friendly window upgrades come down to three things: safer glass choices (often laminated), better sound control (often measured with STC), and better security/comfort through sealing and hardware. Hail and high-contrast weather make these upgrades more than “nice to have” for many Front Range homes.

If you want one simple rule: choose the upgrades that still matter on the worst day of the year—a hailstorm, a windy cold front, or a noisy summer night. When the glass, seals, and locks are chosen intentionally, your windows stop being a weak point and start being a real performance upgrade.

Ready to upgrade for Colorado hail, road noise, and better security? Schedule a complimentary consultation with us today and ask for a quote that includes laminated safety glass options, noise-control configurations, and upgraded locking hardware. We serve Colorado Springs and the entire Front Range.

Design Inspiration: Modern & Mountain-Modern Window and Door Styles for Colorado Homes

TL;DR — Design Inspiration: Modern & Mountain-Modern Window and Door Styles for Colorado Homes

This guide shows modern and mountain-modern window and door looks that fit Colorado architecture—especially black frame windows and modern entry door styles—while keeping performance and durability in mind.

Key takeaways:

●     Modern style leans on clean lines, big glass, minimal ornament, and intentional contrast.

●     Mountain-modern blends modern simplicity with natural materials, big views, and durability for alpine weather.

●     Black window frames can look sharp in Colorado, but finish durability matters in high-altitude sun.

●     The “best” style choice is one that matches your home’s rooflines, materials (stone/wood/metal), and view corridors.

●     Entry doors are the fastest way to modernize curb appeal—pivot, flush panel, and glass-forward designs are common modern choices.

●     Great design still needs good performance: weather sealing, glazing choice, and quality installation keep the look comfortable year-round.

What is “mountain-modern” style in Colorado?

What is “mountain-modern” style in Colorado?

Mountain-modern style in Colorado blends modern design with natural materials and rugged durability for alpine conditions. It’s the look you see when a home feels contemporary, but still grounded in timber, stone, and the surrounding landscape—usually with big window areas aimed at views.

A useful industry description highlights mountain-modern spaces as being recognized by expansive window views, exposed timber framing, natural materials/colors, and textured finishes, plus practical elements like pronounced overhangs that help with high-altitude sun and storms. It also notes that dark finishes (including black) can outline views and that finish choice matters for harsh mountain climates.

What makes windows and doors feel “modern”?

What makes windows and doors feel “modern”?

Modern windows and doors feel modern when the openings look clean, intentional, and visually light. In real homes, that usually means fewer fussy grids, slimmer-looking frames, and glass that emphasizes daylight and views.

Architects have talked about windows this way for a long time. A modernist idea (often credited to Frank Lloyd Wright’s influence) is that large expanses of glass function like “light screens,” framing outdoor views and connecting indoor life to nature.

You don’t need to build a glass box to use that idea. You just need to design windows like they’re part of the architecture—not an afterthought.

Window styles for modern homes (that work well in Colorado)

Window styles for modern homes (that work well in Colorado)

Window styles for modern homes emphasize clean geometry, bigger glass, and fewer visual breaks. Here are options that consistently look right on modern Colorado homes:

1) Large picture windows (strategically placed)

Large picture windows create the strongest modern look because they prioritize view and daylight. Use them where you actually want to “frame” something: foothill ridgelines, aspens, city skyline, or a landscaped backyard.

2) Horizontal window groupings

Horizontal window groupings feel modern because they reinforce clean lines across the facade. This works especially well on ranch remodels and contemporary infill homes.

3) Clerestory windows

Clerestory windows feel modern because they add daylight without sacrificing privacy. They also look great in mountain-modern great rooms with high ceilings.

4) Corner windows

Corner windows feel modern because they reduce the “boxy” feeling and open up sightlines. They’re a power move in kitchens and living rooms if you have a view angle worth showing off.

5) Minimal grid (or no grid) layouts

Minimal grid layouts feel modern because the glass reads as one clean surface. If you like some structure, keep it simple: one horizontal bar or a very light pattern.

6) Lift-and-slide or multi-slide patio doors

Lift-and-slide or multi-slide doors feel modern because they open walls and connect indoor/outdoor living. In Colorado, this pairs well with covered patios and wind-protected outdoor spaces.

Window and door moves that define mountain-modern homes

Window and door moves that define mountain-modern homes

Mountain-modern homes use modern shapes, but they “warm them up” with natural textures and view-first planning. If you want that look, focus on these moves:

●     Frame the view on purpose. Put the biggest glass where the best view actually is, not where it’s easiest to build.

●     Use contrast thoughtfully. Dark window outlines against stone or wood can look sharp, especially on simpler elevations.

●     Lean into overhangs. They look right in mountain-modern design and help with sun and weather.

●     Choose finishes for altitude. Colorado sun is intense; durability matters as much as color.

●     Create an entry moment. Mountain-modern homes often use a bold door with simple, confident detailing.

Black frame windows in Colorado: how to get the look right

Black frame windows in Colorado: how to get the look right

Black frame windows in Colorado work best when the black is used to outline views and tie together exterior materials. If your home has stone, stained wood, or light siding, black frames can provide a clean contrast that feels modern instead of busy.

To keep it from feeling harsh:

●     Pair black frames with warm materials (wood, stone, textured siding).

●     Repeat black in two or three places (railings, exterior lighting, hardware) so it feels intentional.

●     Avoid mixing black frames with too many competing finishes.

And for Colorado specifically, the “smart” part is making sure the finish choice matches exposure: sunny south-facing elevations and high-altitude sites demand durability.

Types of entry doors for modern homes (and what each one says)

Types of entry doors for modern homes (and what each one says)

Modern entry doors are defined by simple geometry, strong proportions, and intentional hardware. Here are the most common modern door styles homeowners choose:

1) Pivot doors

Pivot doors create a high-end modern statement because they feel architectural and oversized. They’re best when the entry is protected (overhang/covered porch) and the proportions of the facade can handle the drama.

2) Flush slab doors

Flush slab doors look modern because they are clean and unornamented. A single material with minimal detailing is often all you need.

3) Modern doors with vertical glass

Modern doors with vertical glass feel modern because they add light without looking traditional. This works well when the entry hall is dark or when you want a welcoming glow at night.

4) Mixed-material doors (wood + metal accents)

Mixed-material doors feel mountain-modern because they blend warmth and durability. This is a strong choice if the home already uses timber and metal details.

Materials that make sense for Colorado (style + performance)

Materials that make sense for Colorado (style + performance)

Colorado-friendly door and window materials balance looks with weather resistance. The “best” material depends on exposure, maintenance tolerance, and the style you want.

●     Wood: warm and premium-looking, but needs maintenance and good protection.

●     Fiberglass: versatile look (including woodgrain styles) with lower maintenance.

●     Steel: strong and sleek, often great for modern entries, but finish quality matters.

●     Aluminum-clad or durable exterior finishes: helpful in high-exposure environments where sun and storms punish weaker coatings.

If you love a black frame look, ask specifically about long-term finish performance and what’s recommended for your elevation and exposure.

Three easy style “recipes” for Colorado homes

Three easy style “recipes” for Colorado homes

These style recipes help you get a cohesive look without overcomplicating it.

Recipe 1: Denver Modern Refresh

●     Black or dark-bronze window frames

●     Minimal grids or no grids

●     Flush slab entry door with modern hardware

●     One “hero” picture window in the main living area

Recipe 2: Front Range Mountain-Modern

●     Large view windows + clerestories for daylight

●     Dark frames paired with warm wood and stone

●     Covered entry with a statement door (wood or mixed-material)

●     Lift-and-slide door to a protected patio

Recipe 3: High-Country Contemporary

●     Prioritize durability + tight seals

●     Big glass where the view is best, smaller glass where wind exposure is harsh

●     Strong overhangs

●     Bold door color or bold hardware (but keep the rest quiet)

FAQ: Modern vs mountain-modern windows and doors

FAQ: Modern vs mountain-modern windows and doors

Do black windows make a home look smaller?

Black windows can make a home look sharper, not smaller, when they are repeated intentionally and paired with warm materials. Random black accents are what create visual clutter.

What’s the easiest way to modernize curb appeal?

The easiest way to modernize curb appeal is a modern entry door and cleaner window grid choices. You can get a big visual upgrade without changing the entire facade.

Can mountain-modern still look warm?

Mountain-modern looks warm when natural textures lead the design—wood, stone, and lighting—while the windows and doors stay clean and simple.

Summary and next step

Modern style uses clean lines and intentional glass; mountain-modern adds natural materials and durability for Colorado conditions. If you’re deciding between looks, start with what your home already is (rooflines, materials, view corridors), then choose window/door shapes that reinforce that architecture.

If you want a cohesive plan (not a bunch of mismatched upgrades), Modern Windows & Doors can help you select window styles, frame colors (including black), and entry door options that fit your home and Colorado’s climate—so the finished result looks right and feels comfortable.

Window Efficiency 101 for Colorado Homes: U-Factor, SHGC & Triple-Pane Glass Explained

TL;DR — Window Efficiency 101 for Colorado Homes: U-Factor, SHGC & Triple-Pane Glass Explained

This guide explains what U-factor and SHGC mean, how those ratings affect comfort and energy bills in Colorado, when triple-pane glass makes sense in a mountain climate, and what to know about available tax-credit rules.

Key takeaways:

●     U-factor measures insulation performance. Lower is better for Colorado winters.

●     SHGC measures how much solar heat comes through the glass. The “best” SHGC depends on direction and shading.

●     Triple-pane glass can reduce drafts and improve comfort, especially in high-wind or high-elevation areas, but it is not always necessary.

●     In Colorado, big day-night temperature swings and high-altitude sun make “balanced” window choices important, not just “lowest number wins.”

●     Ratings matter, but installation quality (air sealing, flashing, fit) often decides whether the window actually feels draft-free.

●     Federal credit rules have caps and specific eligibility requirements; keep documentation if you want to claim anything.

Why window efficiency feels different in Colorado

Why window efficiency feels different in Colorado

Window efficiency feels different in Colorado because you can have cold nights, strong sun, wind, and fast weather changes in the same week. That mix is why people replace windows even when the old ones “still open and close.” They want fewer drafts, more even room temperatures, and less HVAC cycling.

If you take one idea from this article, let it be this: the right window for Colorado is the one that balances insulation (U-factor) with solar control (SHGC) for your home’s orientation and exposure.

What is U-factor on a window?

What is U-factor on a window?

U-factor is a measurement of how well a window insulates. Lower U-factor means less heat loss through the window, which usually translates to warmer-feeling rooms in winter and fewer cold drafts near glass.

Most homeowners don’t need to memorize the science. A practical way to think about it is:

●     Lower U-factor = better winter comfort

●     Higher U-factor = more heat escaping (and more “cold glass” feeling)


What is SHGC on a window?

What is SHGC on a window?

SHGC (Solar Heat Gain Coefficient) is a measurement of how much heat from sunlight enters through a window. Lower SHGC blocks more solar heat; higher SHGC lets in more solar heat.

In Colorado, SHGC is a “depends” number:

●     If you have strong sun exposure and little shade, too-high SHGC can create summer overheating.

●     If you have good overhangs/shade and want passive winter warmth, a higher SHGC can be helpful on the right sides of the house.

What U-factor and SHGC should Colorado homeowners look for?

What U-factor and SHGC should Colorado homeowners look for?

Colorado homeowners should generally prioritize a low U-factor and then choose SHGC based on window direction and shading. The U-factor helps with winter performance across the board; SHGC is where you dial in comfort room-by-room.

One of the clearest consumer summaries comes from the U.S. Department of Energy: U-factor typically ranges roughly 0.20 to 1.20 for windows (lower insulates better), and SHGC ranges 0 to 1 (lower lets in less solar heat). DOE also recommends choosing U-factor/SHGC based on climate zone and even calls out orientation-based “shop for performance” guidance (for example, cold-climate north-facing windows benefit from the lowest U-factor you can afford).

A simple, Colorado-friendly way to use that guidance

You don’t need a perfect spreadsheet to benefit from ratings. Here’s the practical approach:

●     North-facing windows (least direct sun): prioritize lowest U-factor to reduce cold-wall feeling.

●     South-facing windows (most sun): consider whether you want solar gain (winter warmth) or need to limit it (overheating). Overhangs and shade matter a lot here.

●     East/West windows (hard morning/afternoon sun): SHGC and shading often matter more because glare and overheating can spike.

If you’ve ever had one room that’s always too hot in the late afternoon, that’s usually an east/west SHGC + exposure problem, not an HVAC mystery.

Are triple-pane windows worth it in a Colorado mountain climate?

Are triple-pane windows worth it in a Colorado mountain climate?

Triple-pane windows are worth it in Colorado when comfort problems are driven by cold glass, wind exposure, elevation, or noise—not just “I want the best spec.”

Triple-pane can make sense if:

●     You live in a windy area (foothills, open plains, ridgelines)

●     Bedrooms sit above garages or have large glass areas that feel cold

●     You notice condensation patterns or “cold radiating” off the window

●     You want noticeably better sound control near traffic or busy streets

●     You’re replacing large picture windows where comfort matters most

Triple-pane may not be necessary if:

●     The home already has decent insulation and air sealing

●     Your discomfort is mainly from air leaks around the frame (installation issue)

●     You’re focused on a cost-effective upgrade across many openings

Pro tip: ask what “triple-pane” actually includes

Not all triple-pane packages perform the same. The glass build (coatings, gas fills, spacer system) matters as much as the pane count.

Don’t ignore the “unsexy” efficiency factors

Don’t ignore the “unsexy” efficiency factors

The “unsexy” efficiency factors—air leakage, frame choice, and installation—often decide whether your upgrade feels like an upgrade.

Even a high-rated window can disappoint if:

●     The opening isn’t properly flashed and sealed

●     Foam and backer rod are skipped or rushed

●     The window isn’t squared, leaving gaps that move with temperature swings

If your goal is “no drafts,” prioritize a contractor who talks about the install process clearly, not one who only talks about glass specs.

What about tax credits for energy-efficient windows in Colorado?

What about tax credits for energy-efficient windows in Colorado?

Tax credits for energy-efficient windows in Colorado typically come down to federal rules, plus whatever utility rebates happen to be available in your area.

As of the current IRS guidance page, the Energy Efficient Home Improvement Credit (commonly associated with “25C”) allows 30% of certain qualified expenses and includes annual caps, with specific limits such as $600 total for exterior windows and skylights and $250 per exterior door (up to $500 total), within an overall annual cap structure. The IRS page also notes the credit applies to qualifying property placed in service before December 31, 2025, and highlights documentation requirements (including manufacturer-related requirements referenced for 2025).

What to do with that information (practically):

●     Treat credits as a bonus, not the reason to buy a window that doesn’t fit your home.

●     Keep model numbers, receipts, and any manufacturer certification documentation.

●     If you’re installing after 2025, confirm current eligibility rules before you assume anything.

(Not tax advice—just a homeowner-friendly way to avoid surprises.)

Quick checklist: what to ask your window company

Quick checklist: what to ask your window company

This checklist helps you get answers that map to comfort in your home, not just marketing.

●     What are the U-factor and SHGC ratings for the exact window package quoted?

●     Do you recommend different glass packages by orientation (north vs south vs west)?

●     For triple-pane, what’s the actual glass configuration (coatings, fills, spacer)?

●     How will you air seal and flash the opening (step-by-step)?

●     How do you handle high-altitude UV exposure and temperature swings in material selection?

●     What’s the plan for rooms that currently overheat or feel cold?

FAQ: U-factor, SHGC, and triple-pane windows

FAQ: U-factor, SHGC, and triple-pane windows

Is a lower U-factor always better?

A lower U-factor is almost always better for insulation, especially in cold climates like Colorado. The tradeoff is usually cost, not comfort.

Is a lower SHGC always better?

A lower SHGC is not always better in Colorado because winter sun can be an asset on the right sides of the home. The “best” SHGC depends on orientation, shade, and how your rooms currently behave.

Will new windows eliminate drafts?

New windows eliminate drafts when the window package is efficient and the installation is airtight. If you still feel airflow, it’s usually sealing or fit—not the glass rating.

Summary and next step

U-factor tells you insulation performance; SHGC tells you solar heat gain. In Colorado, the best-performing window choices usually come from combining a low U-factor with a SHGC strategy that matches your home’s exposure—and then installing the window with serious attention to sealing and flashing.

If you want help picking the right ratings for your specific home (instead of guessing from a label), Modern Windows & Doors can map window orientation, comfort issues, and budget into a clear recommendation—including where triple-pane makes sense and where it doesn’t.

How to Measure for Replacement Windows (and Choose Full-Frame vs Insert) in Colorado

TL;DR — How to Measure for Replacement Windows (and Choose Full-Frame vs Insert) in Colorado

This guide explains how Colorado homeowners can measure for replacement windows and decide whether an insert replacement or full-frame replacement makes the most sense for their home’s condition, comfort goals, and budget.

Key takeaways:

  • Insert replacement windows fit inside an existing frame and work best when the existing frame is square, solid, and not water-damaged.
  • Full-frame replacement windows replace the entire unit and make sense when there is rot, water intrusion, or you want to change the window size or style.
  • Measuring correctly means using multiple points and planning for out-of-square openings.
  • Colorado homes often need extra attention to water management because wind-driven weather and strong sun punish weak flashing details.
  • Your measuring method should match the replacement method (insert measurements differ from full-frame rough-opening measurements).
  • Safety matters when measuring above grade, especially around ladders, decks, and walk-out basements.
  • A quick pre-measure checklist reduces bid confusion and helps you get apples-to-apples quotes.

Measuring for replacement windows sounds straightforward until you hit real-world conditions: older frames that are not perfectly square, trim that hides damage, and openings that have shifted over decades. This guide lays out a practical measuring approach for homeowners and explains the key decision behind the tape measure: whether you are buying an insert replacement that fits inside your existing frame or a full-frame replacement that removes the entire unit.

Replacement window measurements start with choosing insert vs full-frame


Replacement window measurements start with choosing insert vs full-frame

Replacement window measurements start with deciding whether the project is an insert replacement or a full-frame replacement, because the reference points and tolerances are different.

If you measure like you are doing an insert but you actually need a full-frame, the numbers will not map cleanly to what the installer needs. If you measure like you are doing a full-frame but you end up doing inserts, you can waste time exposing areas that did not need to be disturbed.

Insert replacement windows are built to fit inside the existing window frame, which means the existing frame becomes the “box” your new unit must match.

Insert replacement is most appropriate when:

  • The existing frame is solid, not rotted, and not water-damaged.
  • The opening is reasonably square.
  • You want less disruption to interior trim or exterior finishes.
  • You are not changing the window size.

Insert replacement is usually faster and can be less expensive, but it depends on the condition of what you are keeping.

Full-frame replacement windows replace the entire unit down to the framing


Full-frame replacement windows replace the entire unit down to the framing

Full-frame replacement windows remove the entire window assembly so the installer can address the rough opening, flashing, and any hidden damage before setting a new unit.

Full-frame replacement is usually appropriate when:

  • The existing frame has rot, soft spots, or water staining.
  • You suspect flashing problems or repeated leaks.
  • You want to change the window size, style, or placement.
  • You are already replacing siding, stucco, or interior trim.

Full-frame can cost more because it is more labor and finish work, but it is also the method that lets you truly “reset” water management and air sealing.

Measuring safely matters because falls happen fast, and working on ladders, decks, or second-story openings adds risk even during “just measuring.”

If any measuring requires work on elevated walking/working surfaces in a construction context, OSHA’s fall protection standard addresses protection at 6 feet or more above a lower level in many construction situations.
 For homeowners, the practical takeaway is simple: do not lean out of openings, do not overreach on ladders, and do not measure anything that requires unsafe positioning—take photos, measure from safer reference points, or have a professional handle that portion.

Measuring for insert replacement windows uses the existing frame as the reference


Measuring for insert replacement windows uses the existing frame as the reference

Measuring for insert replacement windows uses the inside of the existing frame as the key reference, because the new window must fit cleanly within that opening.

Tools you need

  • Tape measure (preferably with a stiff blade)
  • Notepad or phone notes
  • Level (or a straightedge)
  • Step stool (safer than stretching)
  • Flashlight (to inspect corners and sills)

Step 1: Measure width in three places
 Measure the inside width of the frame at:

  • Top
  • Middle
  • Bottom

Write all three numbers down and use the smallest width for ordering guidance, because out-of-square openings are common.

Step 2: Measure height in three places
 Measure the inside height of the frame at:

  • Left
  • Middle
  • Right

Again, record all three and use the smallest height as the working number.

Step 3: Check squareness and level
 A quick check for squareness helps you understand whether the installer may need extra adjustment, shimming, or a different approach:

  • Compare diagonal measurements (top-left to bottom-right, and top-right to bottom-left) if you can access clean corners.
  • Look for visible gaps, uneven reveals, or a sill that is not level.

Step 4: Inspect the sill and lower corners
 The sill and lower corners are where water damage often shows first. If you see soft wood, staining, bubbling paint, or recurring condensation that has damaged the frame, insert replacement may not be the right method.

Measuring for full-frame replacement windows focuses on the rough opening


Measuring for full-frame replacement windows focuses on the rough opening

Measuring for full-frame replacement focuses on the rough opening, which is the framed opening behind trim and exterior finishes.

Homeowners often cannot access the true rough opening without removing trim or exterior materials, so the most useful “homeowner measure” for early budgeting is:

  • Record the visible frame-to-frame size.
  • Record the glass size (visible glass area) as a secondary reference.
  • Photograph interior and exterior trim conditions, especially at the sill and head.

A full-frame quote typically requires a site visit because the installer needs to confirm what is behind the finishes and how water management will be rebuilt.

Full-frame vs insert decisions are best made by the condition of the existing frame and the water management details, because those factors determine whether you are building on a solid foundation.

Insert replacement is often the right call when

  • Frames are structurally sound and dry.
  • You want minimal disturbance to finishes.
  • You are solving drafts and comfort issues without signs of leaks.

Full-frame replacement is often the right call when

  • There is any rot, softness, or repeated leak history.
  • You see staining at the head or sill.
  • You want to change sizes, add egress, or reconfigure openings.
  • You want the cleanest path to modern flashing and air sealing.

Colorado-specific measuring and planning details matter because sun exposure, wind, and winter heating demands amplify small mistakes in air sealing and water control.

If you live along the Front Range, pay attention to wind exposure and sun-facing elevations. If you live in mountain areas, pay attention to snow, ice, and freeze-thaw effects around the sill and exterior trim lines. In any region, clear photos and notes about existing conditions help your installer plan the right approach and help you avoid vague quotes.

A simple pre-quote checklist helps you get accurate bids


A simple pre-quote checklist helps you get accurate bids

A simple pre-quote checklist makes it easier to compare installers because it documents the basics the same way every time.

  • Count total windows and note which ones open vs fixed.
  • Label each opening (Kitchen-1, Living-2, etc.).
  • Record width/height measurements and note “out of square” concerns.
  • Take photos: straight-on interior, straight-on exterior, and close-ups of sills and trim.
  • Note any known leak history or condensation issues.
  • Decide your preference: keep interior trim, change trim, or leave flexible.

When you are ready to measure and plan your replacement windows in Colorado, start by deciding whether your home is a better fit for insert replacement or full-frame replacement, then measure in multiple points, document anything out-of-square, and prioritize safety over “one more measurement.”

If you want a professional measurement and a clear recommendation on full-frame vs insert for your specific openings, book a consult today.

Colorado Window Buying Guide: Vinyl vs Fiberglass, Double vs Triple-Pane & Top Brands

TL;DR — Colorado Window Buying Guide: Vinyl vs Fiberglass, Double vs Triple-Pane & Top Brands

This guide explains how Colorado homeowners can compare window frame materials, glass packages, and major brands to balance comfort, durability, and budget in a high-altitude climate.

Key takeaways:

  • Vinyl windows are usually the most cost-effective and can perform well when you choose strong welds, quality spacers, and a reputable installer.
  • Fiberglass windows are typically the “stability” choice for big temperature swings because the material expands and contracts less than many plastics.
  • Double-pane windows are still the default, but triple-pane can improve comfort and sound control in many Colorado homes.
  • The NFRC label is the easiest apples-to-apples comparison tool for U-Factor and SHGC when you are shopping.
  • Low-E coatings and gas fills matter as much as pane count, especially with Colorado sun and winter nights.
  • “Top brands” should be judged by warranty support, local installer quality, and the right product line, not just the name on the sticker.
  • Federal tax credits can change the math, so confirm current eligibility before you buy.

Colorado homeowners ask the same practical question every year: “What windows make sense here?” Colorado weather is a mix of strong sun, big temperature swings, wind, and winter heating needs, and that combination can punish the wrong window choice. This buying guide breaks down the two decisions that matter most—frame material (vinyl vs fiberglass) and glass package (double vs triple-pane)—and then explains what “top brands” really means when you are getting bids in Colorado.

Colorado window buying starts with climate and comfort goals


Colorado window buying starts with climate and comfort goals

Colorado window buying starts with deciding what you want to improve first—comfort, energy bills, noise control, durability, or appearance—because different window packages prioritize different outcomes.

If winter drafts are the problem, focus on insulation performance and air sealing. If afternoon heat and glare are the problem, focus on solar control. If highway noise or neighborhood noise is the problem, focus on sound-reduction strategies that usually involve glass thickness, laminated layers, and tighter installation details. A clear “top two” list helps you avoid paying for features you do not need.

Vinyl windows are a common choice in Colorado because they are usually the lowest-cost path to a solid upgrade when the product line is well-built and the installation is done correctly.

Vinyl works best when you pay attention to the specific build quality points that affect longevity: reinforced meeting rails, durable welds at corners, quality weatherstripping, and hardware that does not feel loose. In Colorado, ask how the window line handles sun exposure and temperature swings, because cheaper vinyl can warp or feel “soft” over time if the design is underbuilt.

When vinyl is a strong fit

  • You want a meaningful upgrade over older aluminum or drafty wood windows without jumping to premium pricing.
  • Your openings are fairly standard sizes.
  • You are prioritizing payback and overall project budget.

When vinyl is not the best fit

  • You want very narrow frames for maximum glass area.
  • You want a darker exterior color in full sun and need strong heat-management performance from the product line.
  • You are doing a high-end architectural look where frame sightlines matter most.

Fiberglass windows are the stability play for temperature swings and long service life


Fiberglass windows are the stability play for temperature swings and long service life

Fiberglass windows are often chosen in Colorado because the material is dimensionally stable, which can help the unit hold tight seals through hot days and cold nights.

Fiberglass typically costs more than vinyl, but many homeowners justify the upgrade when they want a stiffer frame, longer-term durability, or a premium painted finish. Fiberglass can be a strong choice for large openings, picture windows with narrow profiles, and homes where you want the window to “feel” more rigid when you operate it.

Where fiberglass tends to shine

  • Larger window sizes where stiffness matters.
  • Homes exposed to strong sun and big seasonal swings.
  • Projects where long-term performance is more important than lowest upfront cost.

Composite and wood windows are usually chosen for specific design goals, and the trade-offs are worth stating plainly before you fall in love with the look.

Wood interiors can be beautiful, but wood requires care and is less forgiving if water management is poor. Composites vary widely by manufacturer, so the performance depends heavily on the specific product line and how it is built. If you are comparing these categories, warranty terms and local service support matter as much as brochure claims.

Double-pane windows are still the default for most replacements


Double-pane windows are still the default for most replacements

Double-pane windows are the default replacement choice because they often deliver a large comfort and efficiency jump over older single-pane or leaky double-pane windows at a reasonable price.

For many Colorado homes, a modern double-pane unit with the right Low-E coating and a quality install can feel dramatically better than what it replaced. Double-pane is also where you will usually find the widest range of price points across brands.

Triple-pane windows are often chosen in Colorado when comfort is the priority, when the home is in a colder or windier microclimate, or when sound control matters.

Triple-pane is not automatically “better” for every room, because the value depends on what you are fixing. Bedrooms that feel cold at night, north-facing rooms, and windy exposures are common places where triple-pane can feel worth it. Many homeowners mix packages—triple-pane where it matters, double-pane elsewhere—to control budget while still solving the biggest comfort issues.

The NFRC label is the comparison tool you should trust


The NFRC label is the comparison tool you should trust

The NFRC label is the simplest way to compare window energy performance across brands because it standardizes key ratings like U-Factor and Solar Heat Gain Coefficient (SHGC).

If you only learn two terms, learn these:

  • U-Factor: how well the window insulates (lower is better).
  • SHGC: how much solar heat the window lets in (lower blocks more sun heat).

In Colorado, you usually want a strategy that fits the elevation, sun exposure, and heating season in your specific location, not a one-size-fits-all “lowest number wins” approach.

Low-E coatings and gas fills are major performance drivers because they influence heat transfer and solar gain even more directly than frame material alone.

Pane count matters, but so does what is between and on the glass. Ask each bidder what glass package is included, what the Low-E coating is designed to do (solar control vs insulation emphasis), and whether the quote is consistent across all windows or varies by exposure.

“Top brands” in Colorado should be judged by product line, not just the name


“Top brands” in Colorado should be judged by product line, not just the name

“Top brands” should be evaluated by the specific series being quoted, warranty strength, and installer quality, because most big manufacturers sell multiple tiers that perform very differently.

Instead of asking “Is Brand X good?”, ask these more useful questions:

  • Which product line or series is this bid using?
  • What is the glass package and NFRC rating for that exact configuration?
  • What is covered in the warranty, and who actually services it locally?
  • Who is installing the windows, and how is water management handled at the opening?

In practice, a mid-tier line installed correctly can outperform a premium line installed poorly. That is why comparing bids by “brand name only” usually leads to confusion.

Colorado bid comparisons should start by confirming you are comparing the same scope, because two quotes can look similar until you notice one includes better flashing details, upgraded glass, or a different replacement method.

A clean comparison checklist includes:

  • Replacement method (insert vs full-frame) and what is included in trim and exterior finish work
  • Glass package details (Low-E type, pane count, gas fill)
  • NFRC ratings for the quoted configuration
  • Warranty details (product and labor)
  • Jobsite protection, debris handling, and project timeline assumptions

Tax credits can affect your net cost, so confirm the current rules before you buy


Tax credits can affect your net cost, so confirm the current rules before you buy

Tax credits can materially affect your net cost because the federal Energy Efficient Home Improvement Credit has specific annual limits for windows, skylights, and doors.

As of the IRS guidance, the credit is capped annually and includes a specific limit for exterior windows and skylights ($600) and exterior doors ($250 per door, $500 total) within the broader annual cap for certain improvements.
 (Always confirm eligibility requirements for the exact products you are buying and keep documentation.)

When you are ready to choose windows for your Colorado home, narrow your decision to (1) the right frame category for your budget and durability goals and (2) the right glass package for your exposures and comfort needs, then compare bids using the same scope and performance labels.

If you want a professional opinion on the best mix of vinyl vs fiberglass and double vs triple-pane for your specific elevations, sun exposure, and rooms, schedule a consultation here.

Essential Tools & Equipment Checklist for Flawless Window & Door Installation

TL;DR – Essential Tools for Flawless Window & Door Installation

  • A clear installation tools checklist keeps your project on track, prevents mid-job trips to the store, and helps you decide what you can DIY vs. when to hire a pro.
  • For measuring & layout, you’ll need basics like a tape measure, level, pencil, and often extras like a framing square, angle finder, and laser level to ensure openings are plumb, level, square, and sized correctly.
  • Demolition & removal tools (pry bars, hammer, oscillating tool, utility knife, reciprocating saw, drill/driver, plus drop cloths and a shop vac) let you remove old units with minimal damage and keep dust and debris under control.
  • Setting & fastening tools (levels, squares, shims, drill/impact driver, screw gun, and any required brackets or anchors) make sure new windows and doors are installed plumb, level, and square for smooth operation and proper sealing.
  • Shims, flashing & sealants (sill pans, flashing tape/membranes, low-expansion foam, exterior sealant, backer rod) are critical for long-term protection against drafts and water intrusion—generic foam or caulk is not a good substitute.
  • Safety gear & ladders (eye, hand, hearing and respiratory protection, sturdy footwear, proper ladders) are non-negotiable, especially when lifting heavy units or working at height; older homes may also require lead-safe practices under EPA’s RRP Rule.
  • Cleanup & finishing tools (shop vac, broom, trash bags, drop cloths, caulk gun, nail set, painter’s tape, brushes/rollers) help you leave the space clean and complete with neat trim, paint touch-ups, and clear glass.
  • Build a project-specific list based on your scope (simple replacements vs. whole-house or upper floors), the products you’re using, and their installation instructions—then decide what to buy, rent, or leave to a professional installer.

If you’d rather skip assembling the full toolkit and safety setup, Modern Windows & Doors can handle installation with the right tools, training, and expertise already in place.


Why an Installation Tools Checklist Matters

diy tools on wood

An installation tools checklist matters because it keeps your window and door project moving instead of stalling every time you need a tool you do not have. When you know exactly what you need for measuring, removal, installation, sealing, and cleanup, you can schedule work realistically and avoid mid-project delays. A clear list also makes it easier to decide whether to handle a task yourself or hire a professional, because you can compare the tools you already own with what a full installation actually requires. Most important, a checklist forces you to think about safety gear and building requirements up front, not as an afterthought.

Measuring and layout tools help you get openings right the first time by confirming that the new unit will fit, operate properly, and seal against drafts. At minimum, you need a sturdy tape measure, a carpenter’s pencil, and a reliable level; many installers also rely on a framing square, an angle finder, and a straightedge to check that sills and jambs are truly square. A laser level or cross-line laser can be useful for aligning multiple windows along a wall so sightlines match. Keeping a simple worksheet or notebook with rough opening sizes, product dimensions, and any casing or trim details prevents measurement mistakes from turning into ordering errors or extra labor on installation day.

Demolition & Removal Tools: Taking Out Old Windows and Doors Safely

Demolition and removal tools let you take out old windows and doors with less damage to surrounding finishes and framing. Common tools include flat pry bars for freeing trim, a hammer, a multi-tool or oscillating tool for cutting caulk and nails, and a utility knife for scoring paint lines before you pry. For tougher removals, a reciprocating saw with metal and wood blades can cut fasteners that are hidden behind jambs, while a drill or driver removes screws from previous installations. Having drop cloths, buckets, and a shop vacuum ready from the start helps control dust, glass fragments, and debris so the rest of the home stays as clean and safe as possible.

Setting and fastening tools help you install each new window or door plumb, level, and square so it operates smoothly and seals correctly. Core tools include a high-quality level, a combination square, wood or composite shims, and a drill or impact driver with the right bits for manufacturer-recommended fasteners. For door installations, you may also want a screw gun with adjustable clutch settings to avoid over-driving screws and distorting the frame. Specialized items such as installation brackets, structural screws, or masonry anchors are often required for particular wall types, so it is essential to review manufacturer installation guides and confirm you have those materials on site before you start setting units in place.

Shims, Flashing & Sealants: Protecting Against Drafts and Water

Shims, flashing, and sealants protect your installation against drafts, water intrusion, and long-term damage to surrounding materials. Wood or composite shims support the frame and keep it square without crushing the window or door, while a properly sloped sill or sill pan helps direct any incidental water outward. Self-adhesive flashing tape, flexible flashing membranes, and back dams work together to tie the opening into the wall’s weather-resistive barrier. For air-sealing, a low-expansion spray foam rated for windows and doors fills gaps without bowing frames, and high-quality exterior sealant and backer rod complete the perimeter seal at the exterior. Having these materials on your checklist reduces the temptation to substitute generic foam or caulk that may not perform over time.

Safety gear and ladders protect you and anyone helping you while you move heavy units and work at height. At a minimum, you should plan for safety glasses, cut-resistant gloves, hearing protection, and a dust mask or respirator when cutting, sanding, or disturbing old paint or trim. Sturdy footwear with good traction helps when you are carrying units over uneven ground or working on ladders. According to CDC ladder safety data, there were 161 workplace deaths and more than 22,000 workplace ladder injuries in 2020, which underscores how important it is to choose the right ladder, place it on stable footing, and maintain three points of contact while you climb. If your home was built before 1978, the EPA’s Renovation, Repair and Painting (RRP) Rule also requires lead-safe work practices when disturbing painted surfaces, and window replacement is specifically listed as a covered activity, so it is wise to plan for proper containment and cleanup.

Cleanup & Finishing Tools: Leaving the Job Site Ready to Enjoy

Cleanup and finishing tools help you leave the job site ready to enjoy instead of cluttered with dust and scraps. A shop vacuum with fine-dust filters, a broom and dustpan, and heavy-duty trash bags handle most demolition debris and sawdust. Plastic sheeting or reusable drop cloths protect flooring and furniture during the work and make final cleanup faster. For finishing details, keep a lightweight hammer, nail set, caulk gun, painter’s tape, and small brushes or rollers handy so you can install interior trim, touch up paint, and tidy sealant lines without multiple trips to the store. A final pass with a microfiber cloth on the glass and hardware makes new windows and doors look as good as they perform.

Building your project-specific tools list starts with your scope of work and the type of home you have. For a straightforward replacement of a few modern vinyl windows, you might only need basic hand tools, shims, sealants, and a step ladder. For a whole-house project, large patio doors, or work on upper stories, you may need heavier lifting equipment, additional ladders or scaffolding, and more extensive safety gear. Review manufacturer installation instructions for each product line you plan to use and highlight any required tools or materials that are not already on your list. Then compare that list to the tools you own and decide whether to rent, borrow, or hire a professional for portions of the job that require specialized equipment or experience.

Plan Your Next Window & Door Project with Modern Windows & Doors

Planning your next window and door project with the right tools and equipment means your investment in new products can deliver the comfort, performance, and curb appeal you expect. Once you have a sense of your scope, schedule, and tool needs, you can decide how much of the work to take on yourself and where a professional installer will save time and reduce risk. When you would prefer a team that already brings the full tool kit, safety training, and product expertise to your home, you can connect with Modern Windows & Doors here to discuss options that fit your replacement or upgrade plans.

Financing Your Window & Door Project: Loans, Incentives & Payment Plans

TL;DR – Financing Your Window & Door Project

  • Financing lets you spread the cost of new windows and doors over time, so you can upgrade sooner and choose higher-performing products instead of the cheapest option.
  • Total project cost usually includes products, pro installation, removal/disposal, trim and hardware, possible framing repairs, permits, and any custom or upgraded features, build a detailed line-item budget plus a contingency.
  • Common ways to pay include home equity loans/HELOCs, personal loans, credit cards, and contractor financing (fast and convenient but always compare APR, fees, and terms).
  • Tax credits, rebates, and energy-efficiency incentives can significantly reduce your net cost and future utility bills if you choose qualifying ENERGY STAR–level products and keep required documentation.
  • To choose the best plan, compare APRs, total repayment over the loan term, monthly affordability with your other bills, and any prepayment penalties—then secure financing before signing the installation contract so your funding and project scope line up.

Modern Windows & Doors can help you explore styles, performance options, and financing approaches that match both your home and your budget.

Upgrading residential windows and doors is one of the highest-impact improvements you can make to comfort, curb appeal, and long-term energy costs. Financing your window & door project turns that big one-time price tag into manageable payments, so you can replace drafty units or outdated doors on a realistic timeline instead of postponing the work for years. This guide walks through the main financing options, available incentives, and practical steps to choose the right payment plan for your home.

Why Financing Your Window & Door Project Matters

housing costs interest rates

Financing your window & door project matters because it lets you align a large, one-time expense with your monthly budget instead of draining savings all at once. When you spread costs over time, you can often afford better-performing windows and doors that reduce drafts, noise, and energy waste rather than settling for the cheapest option. Better products and professional installation can increase comfort, improve security, and support your home’s resale value, which means you are pairing a predictable monthly payment with long-term benefits.

Understanding the total cost of a window & door project helps you choose a financing option that fits the full price, not just the headline quote. A complete replacement project usually includes product costs, professional installation, removal and disposal of old units, trim work, hardware upgrades, and any necessary repairs to surrounding framing. Your quote may also reflect permit fees, custom sizes, specialty glass, or upgraded finishes that add to the total. Building a line-item budget and adding a contingency for surprises gives you a clear target amount to finance and reduces the risk of mid-project cash shortfalls.

Home Equity Loans and Lines of Credit

modern house hedge maze

Home equity loans and lines of credit are common ways homeowners finance larger window and door projects using the value they have built in their homes. A home equity loan typically provides a fixed lump sum with a fixed interest rate and a set repayment term, which makes your monthly payment predictable for the life of the loan. A home equity line of credit (HELOC) usually offers a variable rate and flexible draws, which can work well if you are staging projects or expect cost changes. Because both options are secured by your home, they often offer lower interest rates than unsecured credit, but they also carry more risk if you miss payments, so it is important to borrow conservatively and understand the terms.

Personal loans and credit cards can play a role in financing your window & door project when you do not want to tap home equity or need a smaller amount. A personal home improvement loan from a bank, credit union, or online lender is usually unsecured, with a fixed rate, fixed term, and predictable monthly payment. Approval often depends on your credit score, income, and existing debts, and interest rates may be higher than secured loans. Credit cards can cover deposits, smaller projects, or unexpected add-ons, especially if you qualify for a promotional 0% APR period, but carrying a balance at standard credit card rates can quickly make the project more expensive, so they work best when you have a clear payoff plan.

Contractor Financing and In-House Payment Plans

New Home Project Agreement

Contractor financing and in-house payment plans are another way to spread the cost of new windows and doors without arranging a separate loan on your own. Many installers partner with third-party finance companies to offer options such as “no interest if paid in full” promotions, fixed-rate installment plans, or longer-term loans with lower monthly payments. These offers can be convenient because you apply directly through the contractor at the time of your quote, and approval decisions may be fast. To protect your budget, read the full terms, check whether promotional interest is deferred or waived, confirm any origination or prepayment fees, and compare the total cost with quotes from your bank or credit union before signing.

Tax credits, rebates and incentives for energy-efficient upgrades can reduce the net cost of your window & door project and lower ongoing utility bills. In many regions, federal or regional tax credits, utility rebates, and local energy-efficiency programs offer financial incentives when you install high-performance windows and doors that meet specified standards. For example, the U.S. Environmental Protection Agency’s ENERGY STAR program reports that replacing poor performing windows with ENERGY STAR certified models can lower household energy bills by an average of about 12%. When you plan financing, ask your installer which products qualify for incentives, confirm any documentation requirements, and factor these savings into your overall budget so you understand both the upfront investment and long-term payback.

How to Compare Payment Plans and Choose What Fits

Comparing payment plans and choosing what fits your situation means looking beyond the monthly payment to the total cost over time. When you evaluate loan or financing offers, start with the annual percentage rate (APR), which captures interest and most fees, and the length of the term, which influences how much you pay in interest. A longer term will usually reduce the monthly payment but increase the overall interest paid, while a shorter term does the opposite. It is helpful to calculate the total amount you will pay over the life of the loan, check for prepayment penalties, and consider how the payment fits alongside other obligations such as your mortgage, car payments, and everyday bills.

Securing financing before you sign a contract helps you move smoothly from estimate to installation without last-minute surprises. A practical sequence is to review your credit report, estimate how much you can comfortably pay each month, and request itemized quotes from reputable window and door companies. With that information, you can compare offers from your bank, credit union, or online lenders and see how they stack up against any contractor financing options. Once you choose a loan or payment plan and receive approval, you can schedule your project with confidence, knowing the funding is in place and aligned with the scope of work.

Plan Your Next Window & Door Project with Modern Windows & Doors

Planning your next window & door project with Modern Windows & Doors means pairing clear financing options with high-quality products and professional installation. When you are ready to explore replacement or upgrade ideas, you can review your budget, consider which financing path makes the most sense, and then connect with the team at Modern Windows & Doors to discuss styles, performance options, and project timelines that match both your home and your financial plan.

Exploring Custom Features: Specialty Windows & Door Innovations

Why Customization Matters (and where it counts)

Every home is a one-off: wall thicknesses, exposures, street noise, coastal winds, interior layouts, and personal taste all collide at each opening. That’s why custom window features and specialty door hardware can pay real dividends in comfort, performance, and day-to-day usability. Beyond aesthetics, the physics are compelling: in typical U.S. homes, heat gain and heat loss through windows account for about 25%–30% of heating and cooling energy use—so getting the glazing, frame, and hardware right is a practical path to lower operating costs and better comfort.

Custom Window Types That Solve Real Problems

1. Corner and clerestory windows (visual drama, filtered light)

Corner glass maximizes sightlines and daylight without a center mullion. Clerestories lift the glass band higher, washing ceilings with light while preserving privacy—great for showers, stairwells, and kitchens.

2. Tilt-turn and hopper/awning configurations (flexible ventilation)

European-style tilt-turn units operate as both hopper (secure top-vent) and casement (full side-swing) in one frame—useful where you want trickle ventilation most of the year and a wide egress on occasion. Awnings shed rain while venting; hoppers are compact, basement-friendly problem solvers.

3. Pass-through and service windows (indoor–outdoor flow)

A bottom-sill height aligned with countertop height turns the kitchen into an entertaining station. Look for low-profile sills, integrated locking, and damped hinges for safety.

4. Radius, triangles, and specialty shapes (architecture-first)

Odd geometries can reinforce a façade rhythm or echo rooflines. When you go off-square, prioritize thermal breaks in metal frames and ensure custom shape gaskets match your climate.

Glazing Innovations Worth Knowing

ross-section view of a modern window frame with multiple panes of glass

1. Low-E coatings (baseline efficiency)

Modern low-emissivity coatings reflect infrared heat while transmitting visible light. They’re tuned by climate: cold-climate low-E favors passive solar heat gain; hot-climate low-E cuts solar heat.

2. Acoustic laminates (quiet rooms)

Laminated glass sandwiches a PVB interlayer that damps sound and remains bonded when cracked—ideal near busy roads or flight paths.

3. Security and storm packages (strength + clarity)

Impact-rated laminated units and beefed-up frames bring coastal resilience without hurricane shutters. For urban projects, laminated glass plus multi-point locks deters opportunistic entry.

4. Electrochromic “smart” glass (glare control on demand)

Switchable tints handle late-afternoon glare on west elevations without heavy shades, useful where views are too good to cover.

Frames And Finishes That Shape Performance

Thermally broken aluminum (slim profiles; modern look).
A polyamide or similar break decouples interior from exterior metal for better U-factors, while permitting those ultra-thin sightlines people love.

Fiberglass and composites (stability champs).
Dimensionally stable frames shrug off temperature swings and permit darker colors without warping; good fits for high-sun exposures.

Clad wood (warm interior, armored exterior).
You get real wood grains inside, with factory-finished aluminum outside for durability. Just verify drainage paths and field-adjustable sills.

Custom powder coat and anodize (coastal smarts).
Marine-grade anodize or multi-coat powder systems extend life near salt air. Ask for documented cycle testing and finish warranties.

Specialty Door Hardware That Changes Daily Use

A hand is reaching out to a modern smart lock on a door.

1. Pocketing and multi-slide systems

Large-panel sliders can stack or disappear into pockets to erase boundaries. Look for stainless rollers, sealed tracks, and weep management for storm events.

2. Lift-slide mechanics

A turn of the handle lifts panels onto rollers, reducing friction so even a 10-foot glass panel glides with two fingers. The same action compresses gaskets when “down” for weather tightness.

3. Multi-point locking (security + sealing)

Instead of one latch, the handle engages several lock points top-to-bottom—improving both forced-entry resistance and air/water performance.

4. Concealed hinges & soft-close checks

Flush, modern profiles benefit from hidden hardware. On outswing patio doors, damped closers prevent slams and reduce hinge stress.

5. Thresholds and accessibility

Low-profile, thermally broken thresholds reduce trip hazards and drafts. For universal design, confirm wheelchair clearance and water management under driving rain.

Integrated Screens And Shades

Retractable screens vanish when you don’t need them—a boon for view-centric designs. Between-the-glass shades (sealed inside IGUs) resist dust, pets, and kid fingerprints, and can be motorized.

Smart Controls And Sensors

close-up shot of a person's finger touching a smart home control panel

Motorized operators on high clerestories, CO₂-triggered vents for stuffy rooms, and reed-switch sensors that talk to your security system all fit neatly into custom fenestration packages. If you’re layering in whole-home control, verify low-voltage cabling paths early.

How To Spec: A Quick Decision Tree

  • Start with climate. Hot-humid, hot-dry, marine, mixed, or cold demands different SHGC/U-factor targets.
  • Set performance targets. Daylight goals; sound reduction (dB); coastal or impact rating; egress; privacy.
  • Choose the operation you’ll actually use. Casements catch breeze; sliders save swing clearance; tilt-turns multitask.
  • Pick a frame family that suits exposure and finish goals. Fiberglass/composites for stability; thermally broken aluminum for minimal sightlines; clad wood for tactile warmth.
  • Lock in hardware and screens. Multi-point locking, retractable screens, and threshold details should be part of the first quote.
  • Confirm ratings. Ask for NFRC labels showing U-factor, SHGC, visible transmittance, and air leakage; compare apples to apples.

Custom doesn’t have to mean chaotic. Build in lead time for shop drawings; mock up a typical opening; and phase installations so you always have at least one egress door and adequate security each night. Pricing will vary by material and complexity; get line-item quotes that separate glass package, frame/finish, hardware, and installation so you can value-engineer intelligently without undercutting performance.

Final Thoughts

Custom window features and specialty door hardware are where architecture meets everyday life: easier ventilation, safer thresholds, quieter bedrooms, and effortless indoor–outdoor circulation. Start with climate-appropriate glazing, pick the operations you’ll actually use, and make hardware choices early so the wall, wiring, and drainage details are right from day one.

If you’re exploring tailor-made innovations for a single opening or a whole home, Modern Windows & Doors can help you translate goals into a spec and an install plan—get started today.

Before & After: Window and Door Replacement Projects

Project 1 — A 1970s Ranch Trades Heavy Frames For Daylight

Before. Narrow, bronze-anodized aluminum sliders and single-pane picture windows made the living room cave-like. Afternoon solar gain pushed interior temps uncomfortably high; condensation formed in winter.

After. Thermally broken aluminum frames with a narrow sightline profile keep the modern look while cutting conduction. A center lift-slide door converted the fixed wall into an everyday opening; adjacent casements catch breezes.

What changed.

  • Daylight levels jumped (we measured +35–45% lux at mid-room compared with the old sliders).
  • Shoulder-season ventilation now cools the house without AC.
  • With multi-point locking, the main slider seals tighter; the dusty draft near the couch disappeared.

Lessons learned.

  • Specify the exact track system (stainless rollers, debris-resistant weeps) when pets and kids carry grit inside.

On west elevations, tune the SHGC to manage late-day heat; it’s the difference between showpiece and sauna.

Project 2 — A Coastal Cottage Gets Impact-rated

House in a Storm

Before. Builder-grade double-hungs rattled in storms; plywood panels went up every hurricane watch. Street noise from the bay road made the small bedrooms restless.

After. Impact-rated laminated glass with reinforced frames, plus awning units high on the wall for secure ventilation. Bedroom windows switched to casements with crank limiters for safety and tighter seals.

What changed.

  • Storm prep is now “spin the handles, check the locks.”
  • Nighttime noise readings dropped ~6–8 dB at the pillow thanks to laminated lites and continuous weatherstripping.
  • Insurance paperwork loves the new labels and rating sheets; premiums reflected the upgrade.

Lessons learned.

  • Align hinge handing with furniture—we flipped two units to avoid hitting a headboard.

Order coastal finish packages (anodize or multi-coat powder) up front; retro-coating later is costly.

Project 3 — An Urban Loft Adds A Steel-look Wall Of Glass

Industrial Loft with Large Window

Before. The loft had brick charisma but one small window and a dark kitchen corner. The client wanted an industrial, steel-grid vibe without winter drafts.

After. A thermally broken aluminum storefront-style system with simulated narrow muntins creates a glass wall along the courtyard. A pass-through window at counter height ties the kitchen to the terrace; a pocketing multi-slide door disappears on party nights.

What changed.

  • Working in the kitchen is now daylight-rich and glare-controlled with a low-E coating tuned for a bright urban courtyard.
  • With between-the-glass shades, cleanup after cooking is basically wipe-the-counter, not dust-the-blinds.
  • Smart-home sensors confirm the door is locked; motorized clerestory awnings auto-vent when CO₂ spikes.

Lessons learned.

  • In masonry retrofits, leave time to modify rough openings and flash to modern standards.

Mock up the threshold and flooring transitions early—small ramps or recessed pans make or break the feel underfoot.

How We Measured “after” (and what you can do at home)

  • Light: A $30 illuminance meter gives repeatable lumen readings at the same time of day.
  • Drafts: Incense or a handheld smoke pencil tells you if the new weatherstripping is doing its job.
  • Sound: Free apps can capture before/after dB(A) at a fixed distance from the window.
  • Comfort: Keep a log—surface temperature of the interior glass on a cold morning can drop drafts and radiant chill dramatically.

The Roi Context (so expectations are realistic)

Window and door upgrades pay back in several ways: energy savings, durability, curb appeal, and happier daily use. But resale math is nuanced. According to the 2025 Cost vs. Value analysis published by Zonda and summarized by the Journal of Light Construction, vinyl window replacement recoups about 76% of its cost nationally. Think of the rest as “dividends” in comfort, quiet, and lower utilities you enjoy while living there.

Planning Your Own Before-and-after

  • Define the problem per room. Glare? Overheating? Street noise? Stubborn doors?
  • Pick operations you’ll actually use. Sliders for big openings, casements where sealing matters, tilt-turns for flexible venting.
  • Tune the glass to the facade. Lower SHGC west/south; more visible light north; consider acoustic laminates on noisy sides.
  • Don’t bury hardware decisions. Multi-point locks, soft-close checks, retractable screens, and threshold details should be on the first quote.
  • Ask for the paperwork. NFRC ratings, impact/wind certificates (if applicable), and finish warranty documents streamline permitting and insurance.

Final Thoughts

The best “after” photos tell a story you can feel: easier ventilation on spring days, calmer bedrooms, door panels that glide instead of fight. Plan from the problem backward, specify with climate in mind, and you’ll get results that look great and live even better.

If you’re mapping out a before-and-after window or door project, Modern Windows & Doors can help scope options, budget, and installation sequencing—start the conversation today.